
In short
- Draw guidelines first: they keep every letter the same height.
- Learn monoline, then brush, then faux calligraphy: thick on the way down, thin on the way up.
- Make the key word the biggest, sketch in pencil, then ink and add a doodle.
- Level
- Beginner friendly
- Time
- About 1 hour
Get the practice sheetsWe just need your email. Unsubscribe anytime.
Hand lettering for beginners starts with two pencil lines and one pen. You draw each letter instead of writing it, so every word turns into a small picture. Learn three easy scripts, put them together in a short phrase, and you've made your first piece.
There's only one real rule: people should still be able to read it. Below are seven steps from your first guideline to a finished phrase, plus a free set of practice sheets to print.
What you can make with it
Lettering fits into small gaps of time. One word takes about ten minutes, a short quote fills a lunch break, and you end up with something finished to look at. A few ideas for your first projects:
- a name in big letters on a birthday card, the kind that ends up on the fridge;
- name tags for gifts and place cards for a family dinner;
- a welcome sign or a banner for a party;
- labels for jars and boxes;
- a favorite quote to frame.
Lettering or calligraphy?
In calligraphy, the tool shapes the letter. A broad nib or a brush makes thick and thin lines as you write.
In hand lettering, you draw each letter and then fill it in, a bit like a tiny illustration. Lettering borrows many of its shapes from calligraphy, so simple calligraphy scripts are a good place to start.
1. Draw your guidelines
Before any letter, draw a few light pencil lines with a ruler. The bottom line is where letters sit. A line in the middle marks the top of small letters, like a or o. A line above it is for tall letters, like h or l, and one below is for tails, like g or y.
Guidelines keep every word straight and every letter the same height. You'll erase them at the end.

2. Start with a monoline script
In a monoline script, every line has the same thickness. Everyday cursive is a monoline script. If you already write in cursive, pick a different monoline style to practice, so it feels like learning a new hand.
It's the easiest script to begin with, because you don't have to think about pressure. Any pencil or ballpoint will do. Write slowly: lettering is drawing, not writing.
3. Try a brush script
Brush scripts mix thick and thin lines, made with a paintbrush or a brush pen. One rule covers most of it: downstrokes are thick, upstrokes are thin. Press as you pull the pen down, and lighten up as you go back up.
Warm up with single strokes first: a thin line up, a thick line down, then ovals and loops. Fill half a page with them before your first letter.
4. Fake it with faux calligraphy
Faux calligraphy is a gentle bridge from calligraphy to lettering. Write a word in monoline script. Find every downstroke and draw a second line beside it, then fill in the gap. The word now looks like brush lettering, and you did it with a regular pen.
Do it in pencil first and ink it when you're happy. Once it feels easy, add flourishes or a little shading.
5. Pick your phrase and your key word
Now for the fun part. Pick a short phrase of three to six words, like "Good things take time" or "Hello, sunshine."
Choose the most important word. That's your key word: it will be the biggest, in brush or faux calligraphy. The smaller words go in monoline, around it.

Tip: short phrases look best. If your quote is long, keep just the part you'd want to read every morning.
6. Sketch the layout in pencil
Draw a light box for each word before you letter it: a big one for the key word, smaller ones above and below. Nudge them until the spaces between words look even and the whole phrase feels balanced.
Then letter each word inside its box, still in pencil.
7. Ink it and add a doodle
Go over the pencil with your pen, slowly, one stroke at a time. Let the ink dry completely, then erase the guidelines.
Finish with a small doodle: a leaf, a tiny heart, a few stars or a swash under the key word. Keep it simple, so the words stay the star.
Common mistakes (and easy fixes)
- Writing instead of drawing. Speed makes wobbly strokes. Slow down and draw each letter.
- Thick upstrokes. The word looks heavy. Lift the pressure as the pen goes up.
- No guidelines. Letters wander up and down. Two pencil lines fix it.
- Letters squeezed together. The word is hard to read. Leave even gaps, about the width of an o.
- Erasing too soon. The ink smudges. Wait until it's completely dry.
Practice a little, often
Ten minutes on most days will take you further than one long session a month. When a style starts to feel easy, pick another one: each teaches your hand something new.
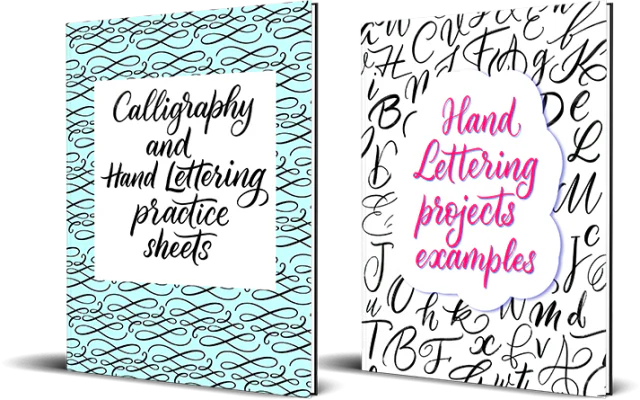
If you'd like a guided path, Modern Calligraphy and Hand Lettering for Beginners is a guide and workbook in one: tools, techniques and a little history, five alphabets to practice and lettering projects, on large 8.5 × 11 in pages. And if you like lettering and coloring together, our Letters of series by Mariia Biriukova mixes both, from Letters of Joy to Letters of Serenity. All of them are in our hand lettering books.
Your first phrase might take a few tries. Keep every version, and date them. In a few weeks you'll see how far your letters have come.
Questions about hand lettering
What's the difference between hand lettering and calligraphy?
In calligraphy the tool shapes the letter as you write. In hand lettering you draw each letter, often in several strokes, like a small illustration.
Is hand lettering hard to learn?
Not to start. If you can write, you can letter: begin with guidelines and a simple script, and go slowly. Brush lettering takes a little more practice.
Do I need special pens?
No. Faux calligraphy gives you thick and thin lines with any fineliner or ballpoint: add a second line to every downstroke and fill it in. When you're ready for brush script, a small brush pen is easier to control than a big one.
How long does it take to learn hand lettering?
It depends on how often you practice. Ten minutes on most days goes a long way, and your first phrase can come together in a single afternoon.
What can I make with hand lettering?
Birthday and thank-you cards, name tags for gifts, party signs and place cards, labels for jars, or a favorite quote to frame.
Want more pages to letter and color?
Get free printable pages